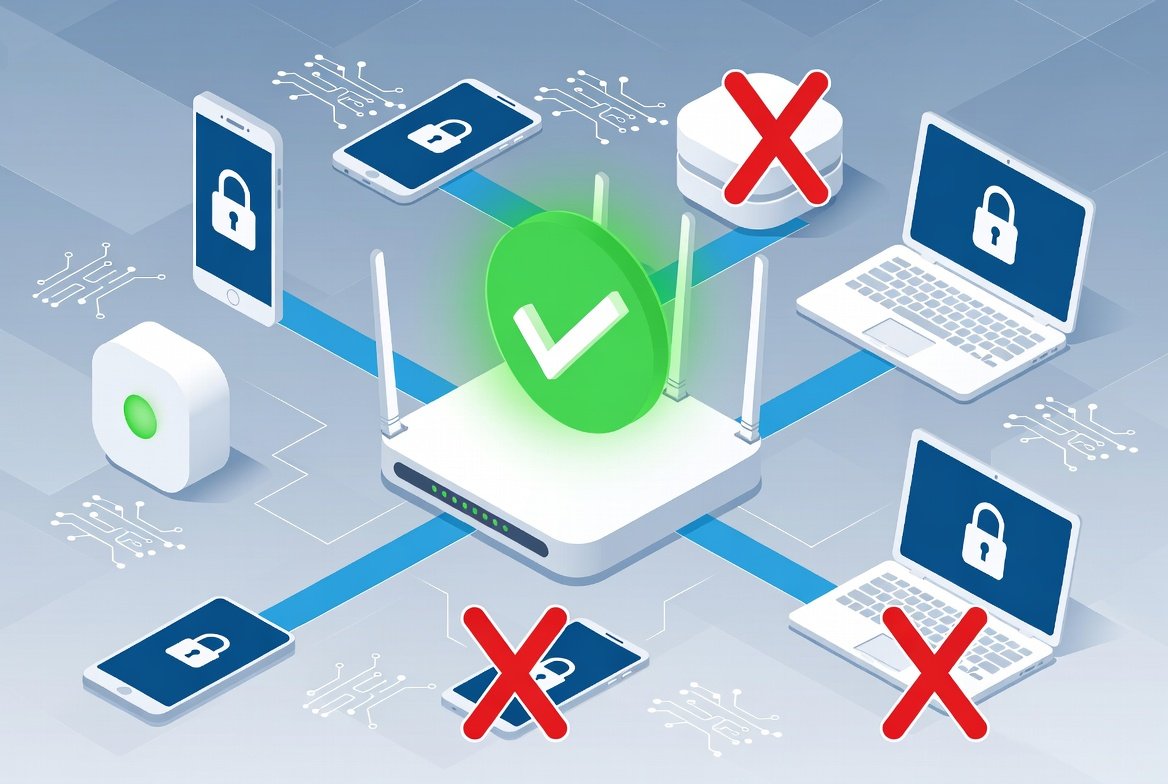
An ISP whitelist (MAC address filtering set to “Allow” mode) restricts your home network to only the specific devices you approve, using tools already built into your router or gateway at no extra cost. Set it up by logging into your gateway’s admin page, finding the MAC filtering or access control section, adding each trusted device’s MAC address, and switching the mode to “Allow.” It takes under 30 minutes and works on most major providers’ equipment — though menu paths and behavior vary by gateway model, so check your specific device’s current interface.
An ISP whitelist lets you control exactly which devices can connect to your home network through the router or gateway provided by your internet service provider. Setting one up costs nothing and takes only a few minutes using the free tools already built into most American ISP equipment. This guide covers the general setup process used by most residential gateways. Menu names and available features may vary depending on your ISP, gateway model, and firmware version.
Key Takeaways
- MAC address filtering set to “Allow” mode restricts your network to only approved devices — it’s free and built into most residential gateways
- Add every current device before switching the filter on, or you’ll lock yourself out
- Exact menu paths vary by provider and even by gateway model within the same provider — check your specific device
- Treat this as one security layer, not a replacement for a strong password — MAC addresses can be spoofed by determined users
What an ISP Whitelist Actually Is
An ISP whitelist (also called MAC address filtering in Allow mode) is a list of approved device hardware addresses stored in your modem or gateway. Only devices whose unique MAC address appears on that list can join your Wi-Fi or wired network. Everything else is blocked at the router level.
This feature is available on nearly all residential gateways supplied by major providers. You don’t need to buy extra software or pay for a higher plan — the setting lives in the free admin interface that comes with your equipment.
Key points:
- It works at the local network level, not by contacting your ISP’s central systems
- It uses the permanent MAC address burned into each device’s network adapter
- Most gateways support both “Allow” (whitelist) and “Deny” (blacklist) modes — for the strongest control, use Allow mode and add only the devices you trust
- The list is limited (often 32–64 entries), so plan carefully if you have many devices
Real-World Scenarios: Who Benefits from an ISP Whitelist
Different households face different security and access needs.
| Household / User Type | Typical Devices | Main Concern | How an ISP Whitelist Helps | Limitations |
|---|---|---|---|---|
| Light user (1–2 people) | Phone, laptop, one smart TV | Occasional unknown device joins | Blocks random neighbors or guests instantly | Few devices make setup fast |
| Standard family (3–5 people) | Multiple phones, tablets, consoles, smart speakers | Kids’ friends or visitors connecting without permission | Keeps only approved family devices online | Must update list when new devices arrive |
| Remote worker / hybrid | Work laptop, personal devices, printer | Protecting work data on shared Wi-Fi | Prevents unauthorized local access | Does not replace strong passwords or a VPN |
| Smart-home heavy | Cameras, lights, thermostats, hubs (15+ devices) | Unknown IoT devices joining | Locks network to known hardware only | List length limits may require prioritization |
| Shared or multi-tenant space | Roommates or temporary guests | Frequent new devices | Easy temporary addition and removal | Requires regular maintenance |
These scenarios reflect common residential patterns. An ISP whitelist adds a useful layer of control without monthly fees.
Step-by-Step: How to Set Up an ISP Whitelist
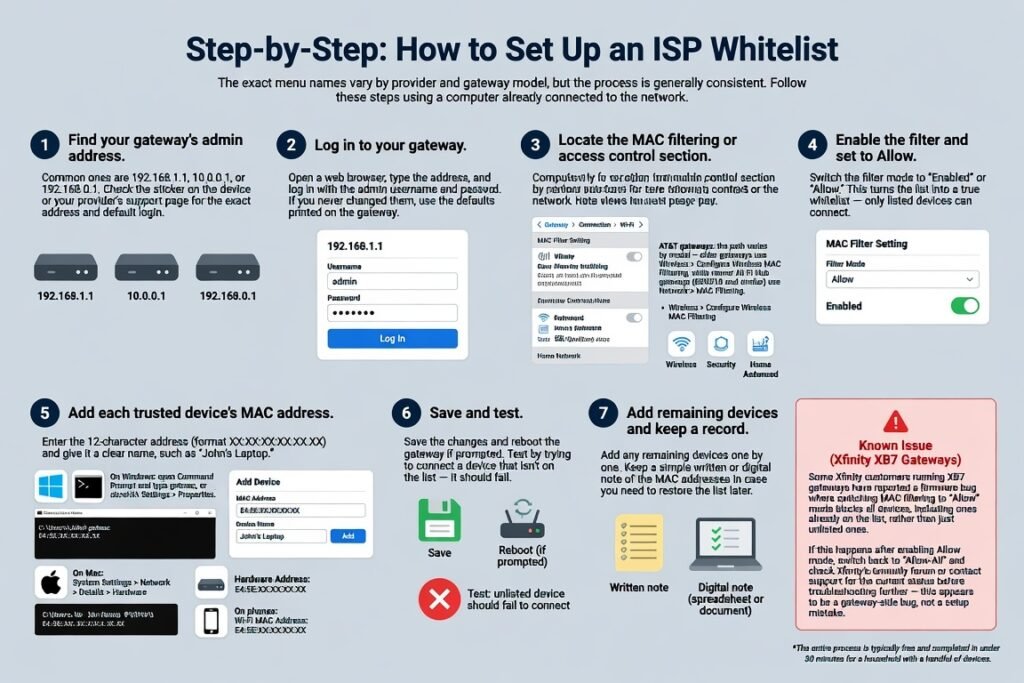
The exact menu names vary by provider and gateway model, but the process is generally consistent. Follow these steps using a computer already connected to the network.
- Find your gateway’s admin address. Common ones are
192.168.1.1,10.0.0.1, or192.168.0.1. Check the sticker on the device or your provider’s support page for the exact address and default login. - Open a web browser, type the address, and log in with the admin username and password. If you never changed them, use the defaults printed on the gateway.
- Locate the MAC filtering or access control section.
- Xfinity gateways: Gateway > Connection > Wi-Fi, then scroll to MAC Filter Setting.
- AT&T gateways: the path varies by model — older gateways use Wireless > Configure Wireless MAC Filtering, while newer All-Fi Hub gateways (BGW210 and similar) use Home Network > MAC Filtering.
- Other providers: look under Wireless, Security, Advanced Settings, Firewall, or Home Network.
- Switch the filter mode to “Enabled” or “Allow.” This turns the list into a true whitelist — only listed devices can connect.
- Add each trusted device’s MAC address:
- On Windows: open Command Prompt and type
getmac, or check Network Settings > Properties. - On Mac: System Settings > Network > Details > Hardware.
- On phones: Settings > About Phone / Wi-Fi details.
- Enter the 12-character address (format
XX:XX:XX:XX:XX:XX) and give it a clear name, such as “John’s Laptop.”
- Save the changes and reboot the gateway if prompted. Test by trying to connect a device that isn’t on the list — it should fail.
- Add any remaining devices one by one. Keep a simple written or digital note of the MAC addresses in case you need to restore the list later.
The entire process is typically free and completed in under 30 minutes for a household with a handful of devices.
A known issue to watch for (Xfinity XB7 gateways): some Xfinity customers running XB7 gateways have reported a firmware bug where switching MAC filtering to “Allow” mode blocks all devices, including ones already on the list, rather than just unlisted ones. If this happens after enabling Allow mode, switch back to “Allow-All” and check Xfinity’s community forum or contact support for the current status before troubleshooting further — this appears to be a gateway-side bug, not a setup mistake.
Practical Tips That Make the Whitelist Reliable
- Update the list whenever you buy a new device or replace an old one — a forgotten entry is the most common reason people turn the feature off
- Use “Allow” mode rather than “Deny.” Deny mode still leaves the network open to any unknown device not explicitly blocked
- Pair the whitelist with a strong Wi-Fi password (WPA3 if available) and change the default admin login — the whitelist is one layer, not the only layer
- For temporary guests, add their device, then remove it after they leave; some gateways support temporary access
- If you use a separate personal router behind the ISP gateway, apply the whitelist there for better control, and keep the ISP gateway in bridge mode when possible
- Test the setup from a device that isn’t on the list before you rely on it
Common Mistakes People Make
Enabling the filter before adding every device. Result: you lock yourself or family members out. Fix: add all current devices first, then turn the filter on.
Assuming MAC filtering is unbreakable. MAC addresses can be spoofed by determined users. Treat the ISP whitelist as a useful barrier against casual or accidental connections, not airtight security.
Forgetting wired devices. Some gateways apply the filter only to Wi-Fi. Check whether Ethernet ports are also controlled, and add those MAC addresses if needed.
Using the wrong MAC address. Phones and laptops often show both Wi-Fi and Bluetooth or randomized addresses. Use the permanent Wi-Fi MAC, not a temporary one.
Never reviewing the list. Over time the list fills with old devices. Periodically clean out entries that no longer exist.
Conclusion
Setting up an ISP whitelist is one of the simplest free security upgrades available to residential internet users. By restricting network access to only the devices you approve, you reduce the chance of unwanted connections without spending money or changing plans. Follow the steps for your specific gateway, keep the list current, watch for known gateway bugs like the Xfinity XB7 issue above, and combine it with a strong password for solid everyday protection. The feature is already sitting in your equipment — activate it today and gain immediate control over who can join your network.
FAQs
Is an ISP whitelist completely free?
Yes. It uses the built-in tools on your existing ISP gateway or router. No extra subscription or hardware is required.
Will an ISP whitelist slow down my internet?
No. The filter checks MAC addresses at connection time and doesn’t affect data speeds once a device is allowed.
What happens if I lose access after enabling the whitelist?
Connect a computer via Ethernet if the filter doesn’t apply to wired ports, or perform a factory reset on the gateway and rebuild the list carefully.
Can I set up an ISP whitelist on any major provider’s equipment?
Most major providers, including Xfinity, Spectrum, AT&T, and Verizon, include MAC filtering on their residential gateways. Check your specific model’s support page for the exact menu path, since it varies even between gateway models from the same provider.
Does an ISP whitelist protect against internet threats?
It only controls which devices can join your local network. It doesn’t replace antivirus software, strong passwords, or careful browsing habits.
Leave a Reply